Here’s how to make a point to point link using two CPE Mikrotik SXT .Many thanks to my friend Frank for images in this tutorial !
connect the first of two Mikrotik SXT to a PC , giving an address to the LAN (hint: use 192.168.88.100/24 ) .
We use the winbox tool ( available here ) and connect through the IP address of the CPE or through the mac address using the username : admin and password blank ( if it is the first time you log in to the device)
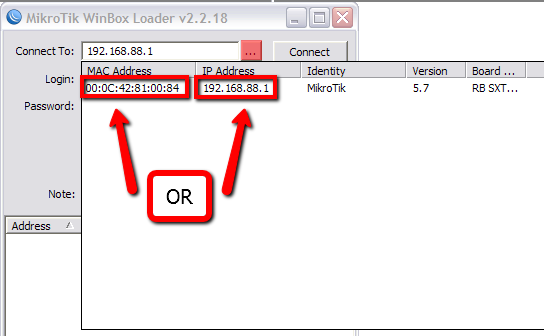
Configure now as the first SXT Bridge.
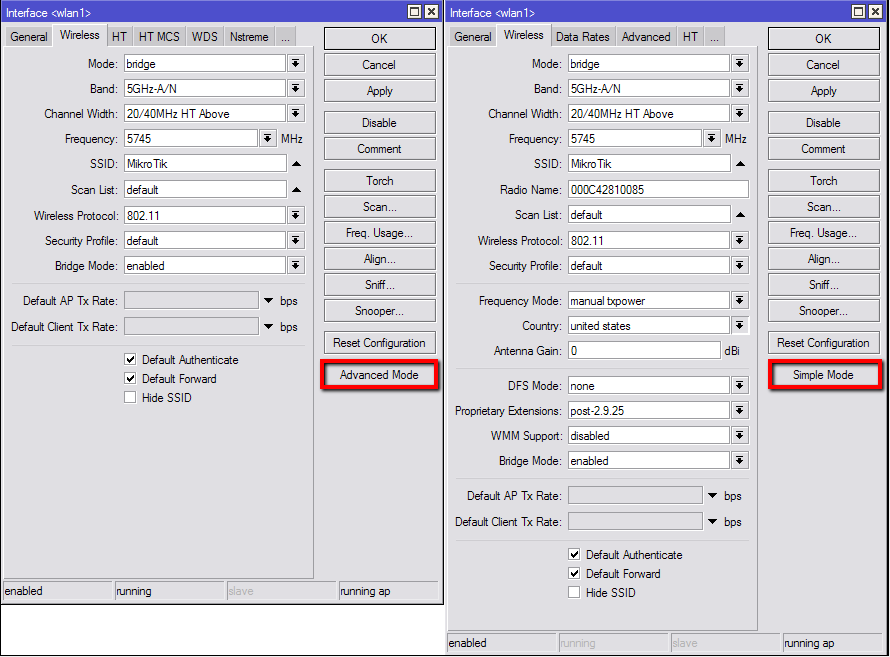
Go to Interfaces, double click on the radio interface and open the Wireless tab . Change , as shown in the figure in Bridge Mode , set a frequency and then Apply
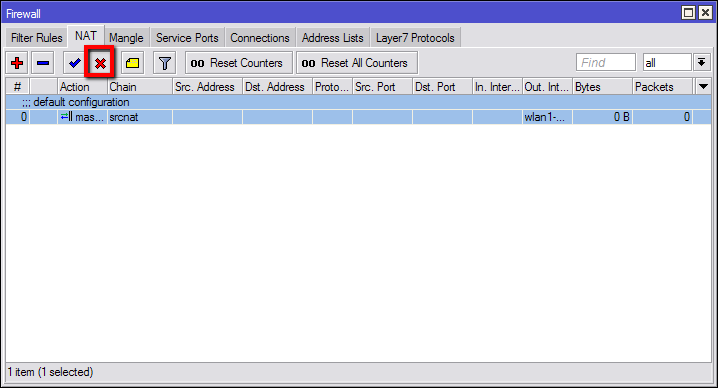
Go to the Menu IP – > Firewall and select the NAT tab .
Disable the rule Masquerade :
Go to IP -> DHCP Server and IP > DHCP Client and disable the two services as they are used in transparent mode .
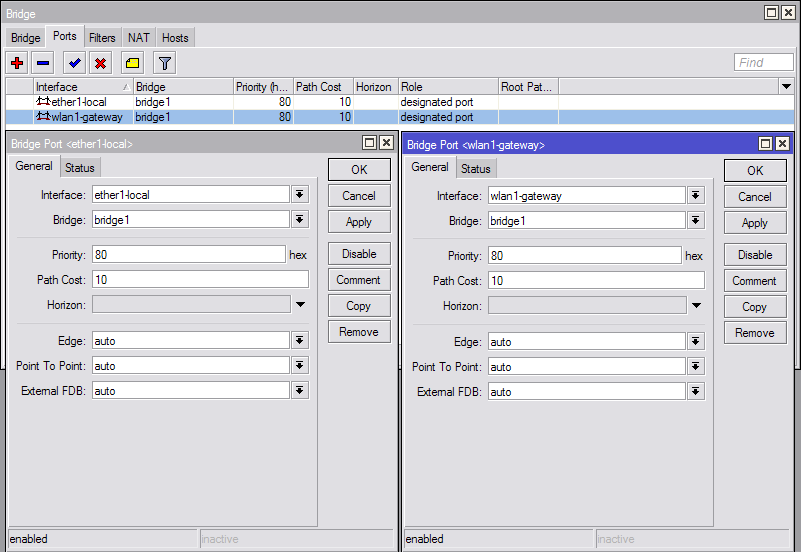
Bridge and choose from the menu to create a new bridge between the Ethernet interface ( Ether1 -local ) and the radio interface ( wlan1 – gateway) :
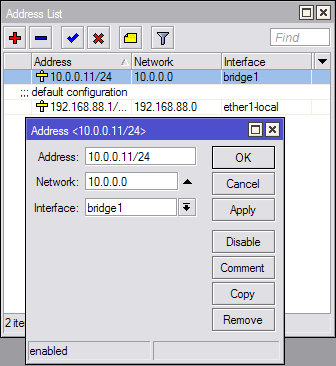
Now that was added to the Bridge no longer need to assign the ip interface Eth but the bridge (also works leaving the ip to the eth , but it is more correct that way! )
Choose an IP address eg . 10.0.0.11 and assign it to the bridge
Then remove the IP address from the interface -local Ether1
The second device is configured exactly the same way by simply changing the IP address of the bridge with another network 10.0.0.X es . 10.0.0.12
For those who need to pass the VLAN on the bridge, you have to first create the VLAN from the Interfaces menu by pressing the + and then create a bridge between the VLAN and the wlan1 – gateway.
interface vlan add name=vlan-10 vlan-id=10 interface=wlan1-gateway disabled=no
interface vlan add name=vlan-20 vlan-id=20 interface=wlan1-gateway disabled=no
interface bridge add name=br-vlan10 disabled=no
interface bridge add name=br-vlan20 disabled=no
interface bridge port add interface=”vlan-10″ bridge=”br-vlan10″ disabled=no
interface bridge port add interface=”wlan1-gateway” bridge=”br-vlan10″ disabled=no
interface bridge port add interface=”vlan-20″ bridge=”br-vlan20″ disabled=no
interface bridge port add interface=”wlan1-gateway” bridge=”br-vlan20″ disabled=no
Go to the Menu IP – > Firewall and select the NAT tab .
 paolodaniele.it – linux & networking


